Responsive Image Slider

Our Features

Create a simple, lightweight and fast image slider



Responsive, touch-enabled and mobile-friendly

An Image Slider that is fully responsive to retain width and proportion of the images. Retina friendly,Touch enabled and keyboard navigation finish it off.



Customizable macro

Choose page image attachments, include/exlude image by labels and use attachments comments as caption/Link or both.

Getting Started

Documentation

ξ€…

Use Responsive Image Slider to create an images slideshows into Confluence pages.

Its fully responsive to retain width and proportion of the images. Retina friendly with 2x resolution possible. Touch enabled and keyboard navigation finish it off. The slideshow pauses on hover and also shows the navigation arrows at the same time.

It comes with a nice bundle of tricks that’s allow you to use at the same time attachments comments as a link, caption title and content.
If all you want to do is create simple, responsive and mobile-friendly images slideshows, then this plugin is the fastest way to get your work done πŸ™‚

How to use?

1 – Overview


Image Slider turns image attachments into a slideshow on your Confluence page. Point it at a page or a whole space, narrow the set with labels or a file-name pattern, pick the exact images you want, and readers get a slider with captions, navigation and optional auto-advance.

2 – Insert macro


1. Edit the page and type `/Image Slider`, or open the macro browser with **+**.
2. Choose **Image Slider**.
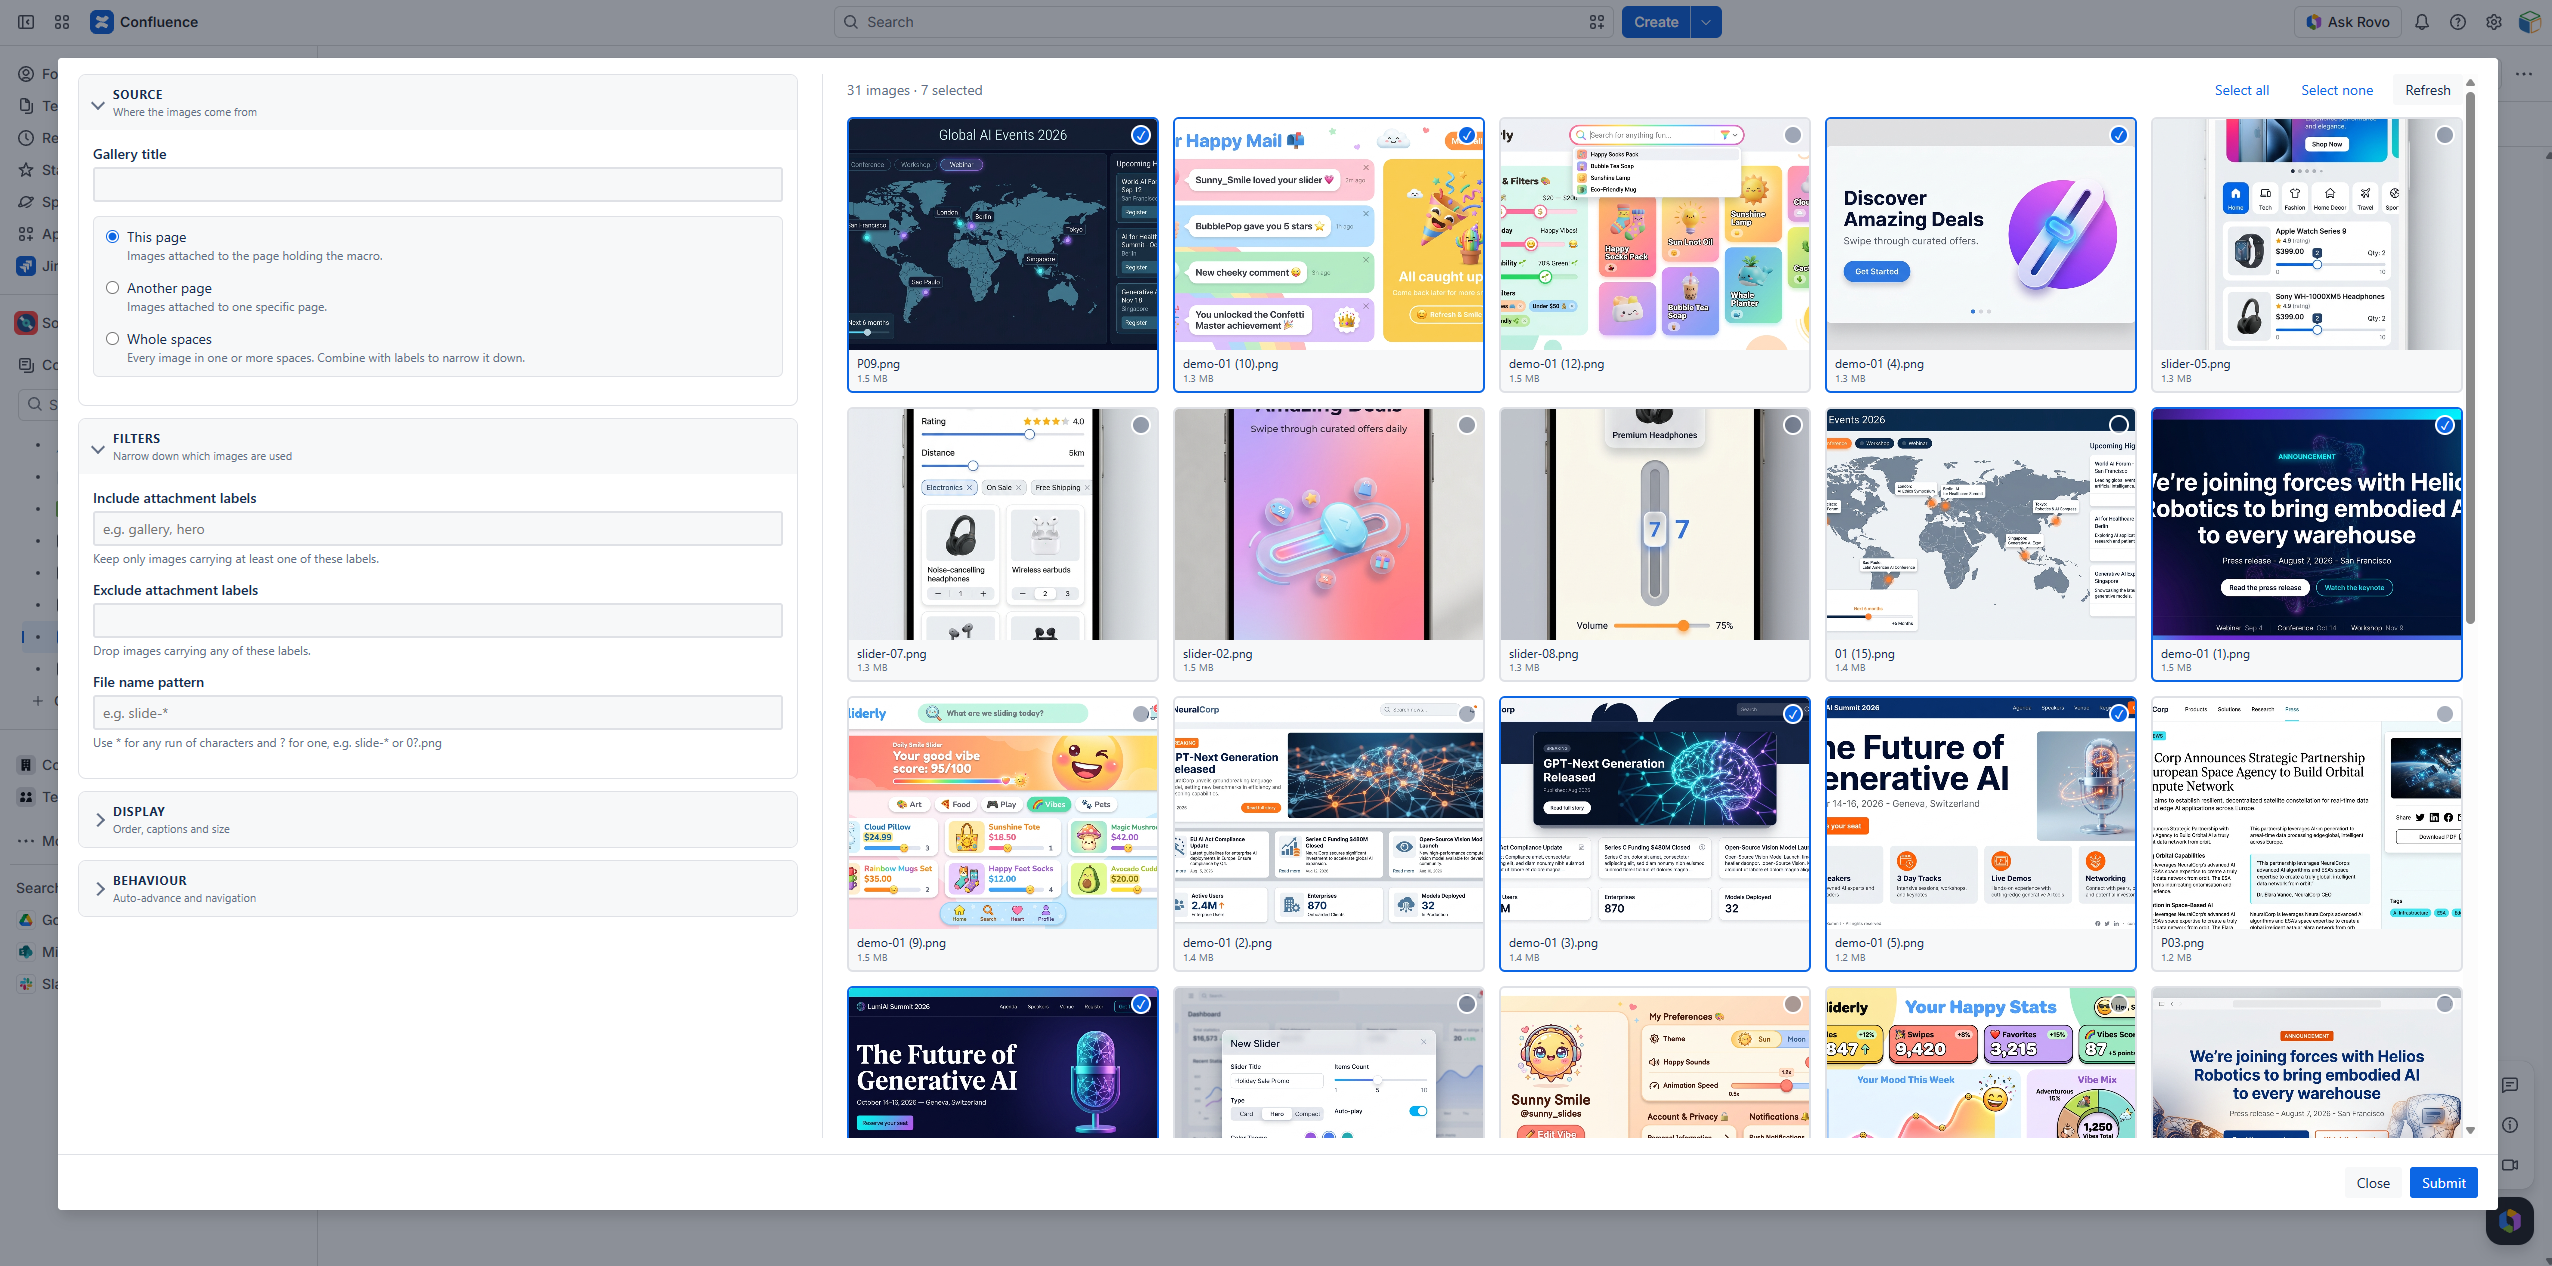
3. The configuration panel opens with the images from the current page already loaded.
4. Adjust the settings on the left, tick the images you want on the right.
5. Select **Submit**, then publish the page.

Inserted without changing anything, the macro shows every image attached to the page it sits on, advancing every 6 seconds.


3 – Parameters


The panel has two halves. Settings on the left, a live preview of the matching images on the right. The preview updates as you type β€” you always see exactly what the slider will
use.

Settings are grouped into four sections. Only **Source** is open to begin with; the others expand when you need them. A section that holds active values shows a badge, so nothing is ever hidden without a hint.

3.1 – Source β€” where the images come from

Gallery titleΒ β€” an optional heading shown above the slider.

Where the images come fromΒ β€” three choices:
Choice Uses
This page Every image attached to the page holding the macro. The default.
Another page Images attached to one specific page.
Whole spaces Every image in one or more spaces. Best combined with labels.

For Another page, start typing a page title and pick from the suggestions. You can also type it by hand as `SPACEKEY:Page title` to reach a page in another space.

For Whole spaces, type one or more space keys separated by commas. Suggestions appear as you type.

3.2 – Filters β€” narrowing the set

Include attachment labels β€” keep only images carrying at least one of these labels.Β Separate several with commas.

Exclude attachment labels β€” drop images carrying any of these labels. Applied afterΒ the include filter.

File name patternΒ β€” match on the file name. Use `*` for any run of characters and `?` for exactly one:

`slide-*` matches `slide-01.png`, `slide-final.jpg`
`0?.png` matches `01.png` and `07.png`, but not `010.png`

Labels are the usual way to curate a gallery: attach whatever you like to a page, label the ones that belong in the slider, and the macro picks them up automatically as you add
more.

Use cases

Two use cases are defined.

1 – Use images in this page


Choose a page from any space. As an option, you can include or exclude images with labels.

2 – Use image in these spaces


To retrieve images you should enter a valid space key and a label.